(561) 400-2205
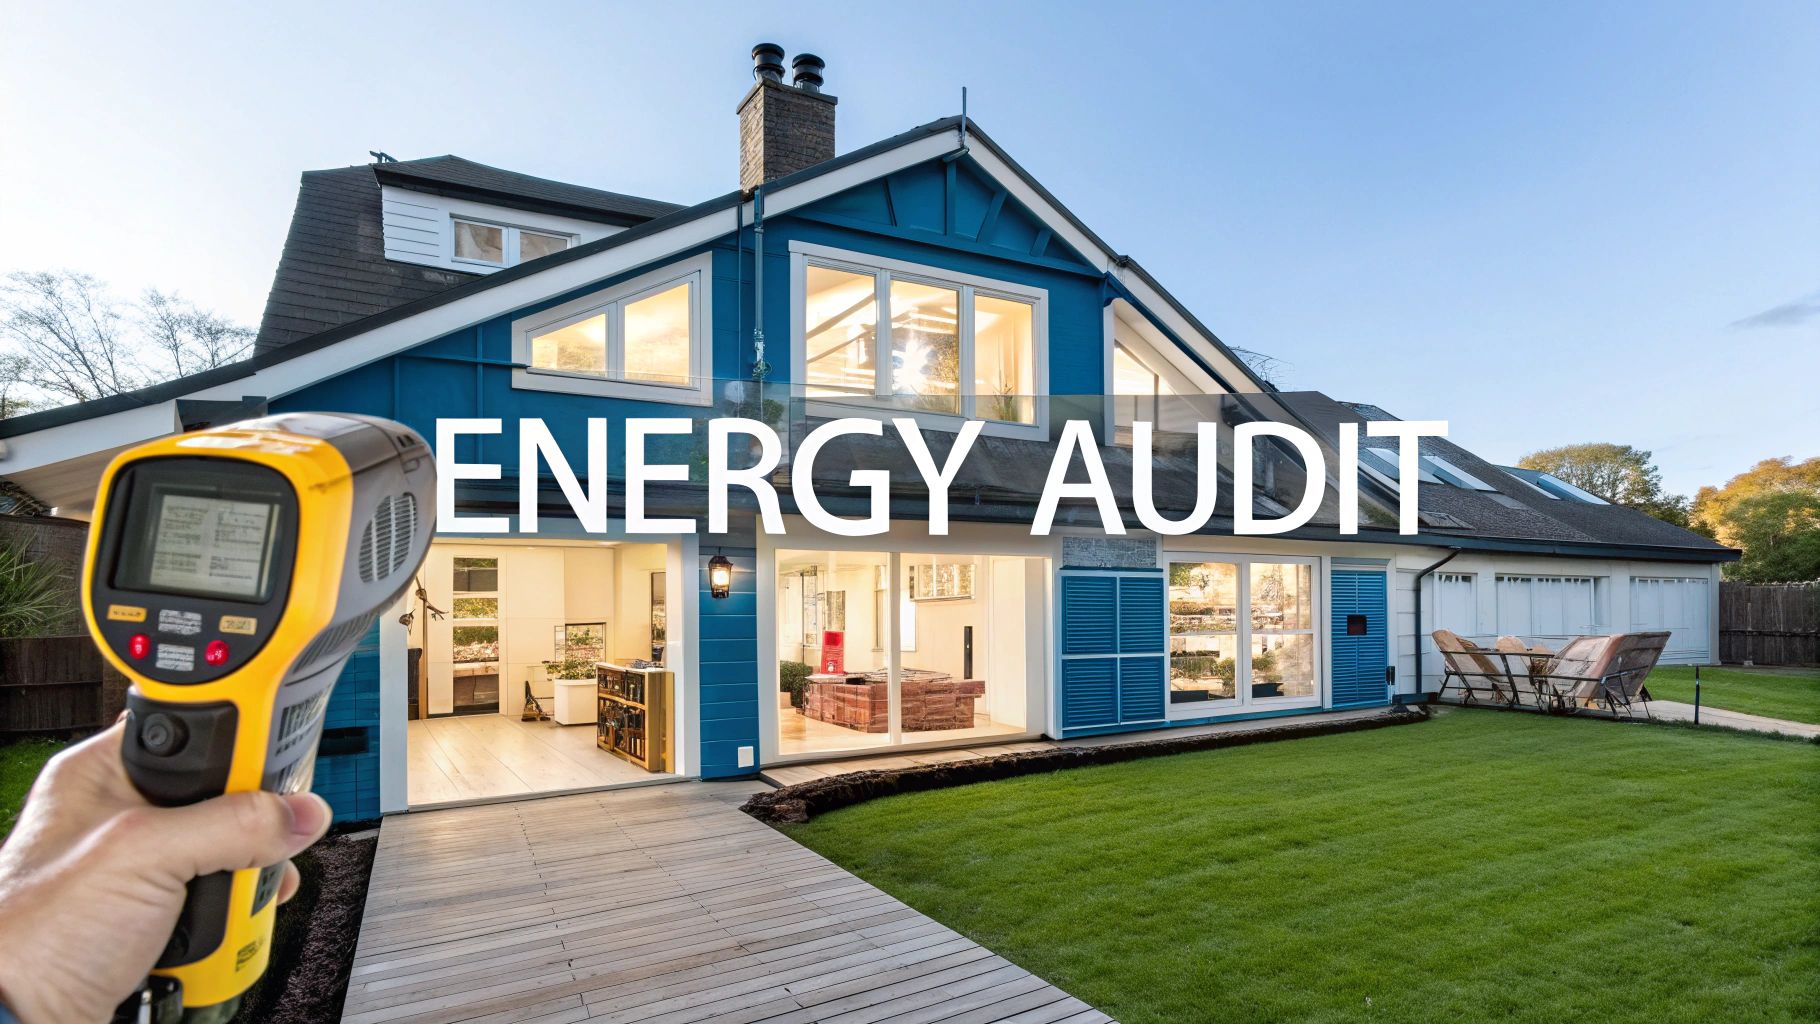
Feeling the strain of high utility bills? You're not alone. Many homeowners unknowingly lose hundreds of dollars each year to energy waste from unseen sources like tiny air leaks, inefficient appliances, and poor insulation. An energy audit is your first step toward taking control, acting as a detailed diagnostic for your home's energy health. It pinpoints exactly where your money is going and provides a clear roadmap to a more comfortable, efficient, and cost-effective home.
Understanding the causes behind a surprisingly large electricity bill is often the first step in realizing the need for an energy audit. To delve deeper into this, read about why your electric bill is so high and what specific factors contribute to those unexpected costs. Recognizing these root causes makes the value of a thorough inspection even clearer.
This comprehensive home energy audit checklist breaks down the entire process into seven manageable areas, empowering you to identify and fix the biggest energy drains yourself. We will guide you through each critical inspection point with practical, actionable steps, transforming what seems like a complex assessment into a simple DIY project. From checking insulation levels and sealing air leaks to evaluating your HVAC system and lighting, this guide covers everything.
By following this checklist, you’ll gain a precise understanding of your home's performance. You will learn not just where you are losing energy but also how to stop it. Let's begin the journey to a smarter, more energy-efficient home and start putting those savings back where they belong: in your pocket.
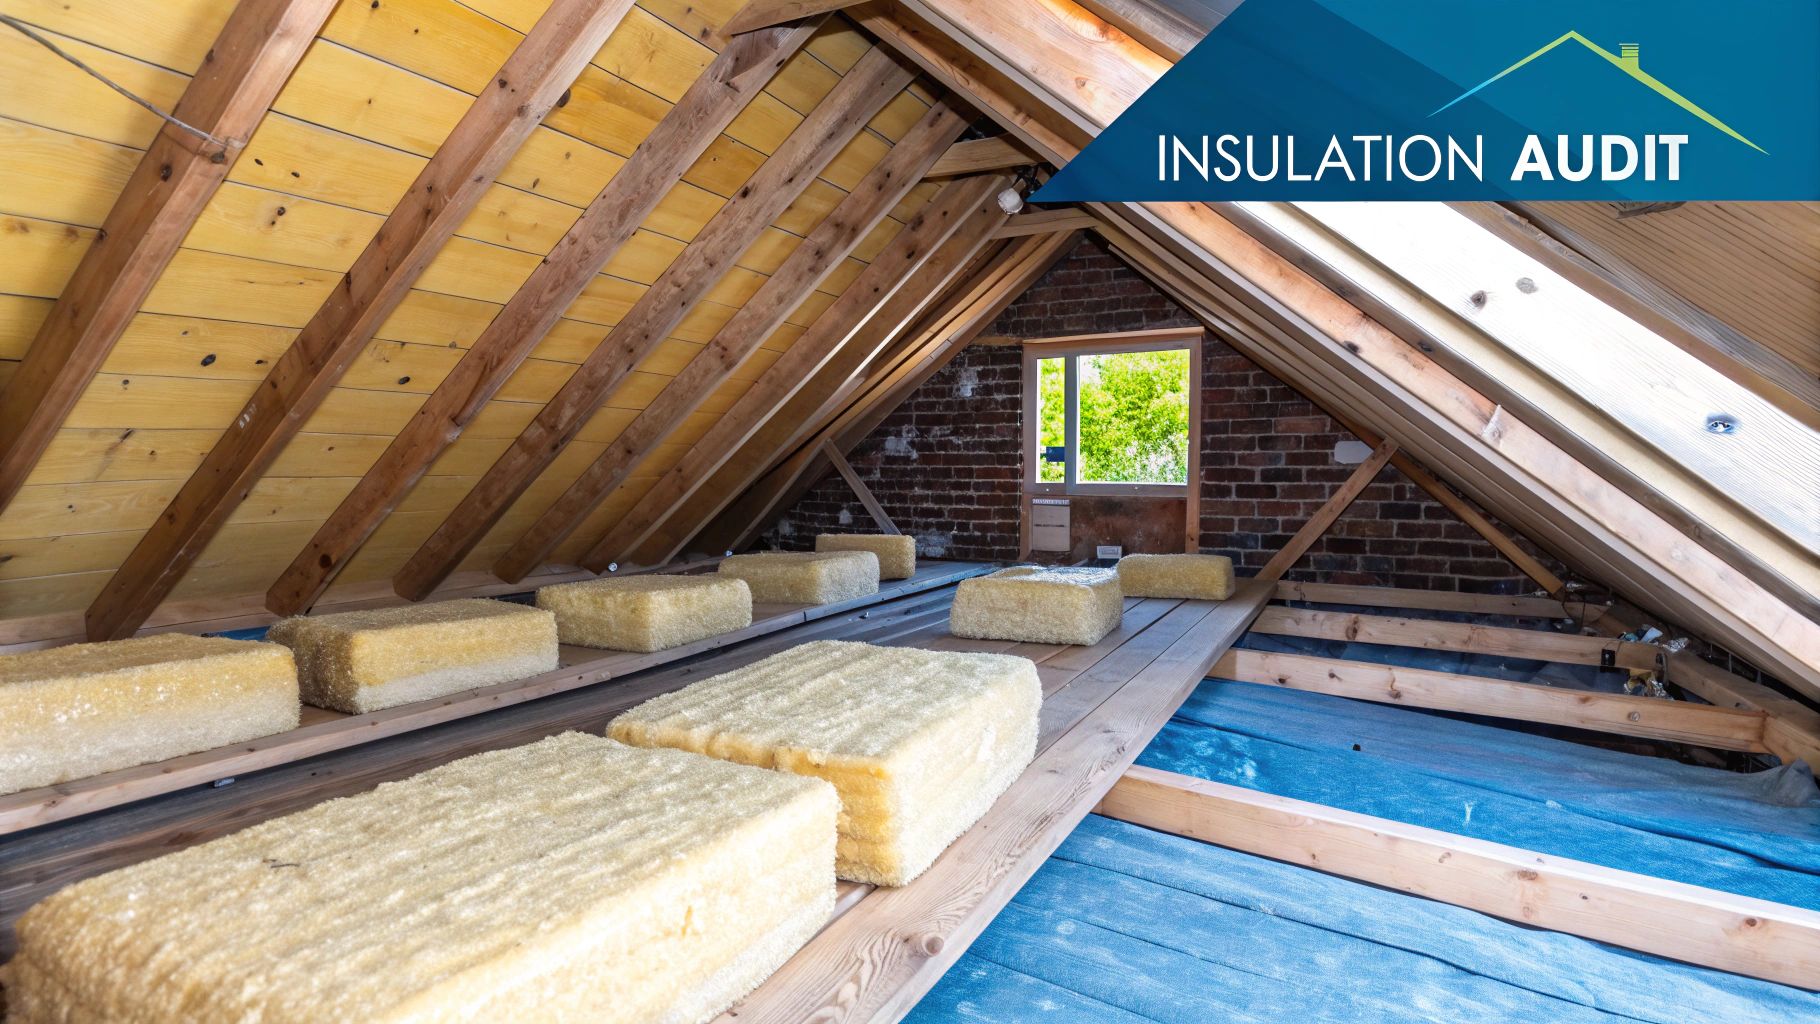
1. Insulation Assessment
The first and most critical item on any home energy audit checklist is evaluating your home's insulation. Insulation acts as a thermal barrier, slowing the transfer of heat between your home and the outside world. In winter, it keeps warm air in; in summer, it keeps hot air out. A thorough assessment of this barrier is fundamental because, without adequate insulation, any other energy-saving efforts, like upgrading your HVAC system, will be significantly less effective. This step involves checking the type, depth (R-value), and condition of insulation in key areas like your attic, walls, floors, basement, and crawl spaces.
Think of it this way: putting on a winter coat with a giant hole in the back won't keep you warm. Similarly, running an efficient furnace in a poorly insulated house is like trying to fill a leaky bucket. Identifying and fixing these "holes" in your thermal barrier leads to substantial energy savings, improved comfort, and a reduced load on your heating and cooling systems.
Practical Steps for Your Assessment
To properly evaluate your home's insulation, you don’t always need expensive tools. Start with a visual inspection and some simple measurements.
- Measure Insulation Depth: Take a ruler or tape measure to your attic. Measure the depth of the insulation in several spots. Compare this to the U.S. Department of Energy’s recommendations for your climate zone. For example, most of Florida (Zone 2) requires an R-value of R30 to R60 for an uninsulated attic, which translates to roughly 10-16 inches of fiberglass batt or blown-in insulation.
- Check for Gaps and Compression: Look for areas where insulation is compressed, missing, or has settled. Compressed insulation loses its R-value and effectiveness. Also, check for gaps around light fixtures, plumbing vents, and ductwork.
- The Flashlight Test: In your attic or crawlspace, turn off the lights and have someone shine a powerful flashlight at the insulation from below (or outside). If you can see light coming through, it indicates thin spots or gaps that need to be filled.
- Note the Condition: Is the insulation wet, moldy, or damaged by pests? Damaged insulation must be replaced, as it can pose health risks and offers zero thermal resistance.
Why This Assessment Is Crucial
The impact of proper insulation is well-documented. Homeowners in the Pacific Northwest have seen heating costs drop by up to 25% after upgrading their attic insulation from R-30 to a more robust R-49. Similarly, a home in Texas can cut summer cooling costs by 10-15% just by installing a radiant barrier on the underside of the attic roof. If your assessment reveals insufficient insulation, you can explore actionable tips to improve home insulation and make your home more comfortable and efficient year-round.
2. Air Leakage Detection
The second critical component of a comprehensive home energy audit checklist is identifying and quantifying air leaks. Air leakage, or infiltration, is the uncontrolled flow of outside air into your home through cracks and openings in the building envelope. This process undermines your insulation, forces your HVAC system to work overtime, and introduces outdoor pollutants and moisture. A systematic inspection to find these leaks is essential for sealing your home's thermal boundary and gaining control over your indoor environment.
Think of it like trying to keep a boat afloat with small holes in the hull. You can bail water out all day, but until you plug the leaks, you're fighting a losing battle. Similarly, your HVAC system can run constantly, but if conditioned air is escaping through unseen gaps while unconditioned air seeps in, you are wasting significant energy and money. Sealing these air leaks is one of the most cost-effective ways to improve home efficiency and comfort.
Practical Steps for Your Assessment
Professionals use tools like a blower door to depressurize a home and pinpoint leaks, but you can conduct an effective initial inspection on your own.
- Perform a Visual Inspection: Carefully check common problem areas for gaps and cracks. Pay close attention to the joints between walls and ceilings, around windows and door frames, electrical outlets, recessed lighting, and any points where pipes or wires enter the house.
- Use the Incense or Smoke Pencil Test: On a cool, windy day, close all windows and doors and turn off your furnace or AC. Light an incense stick or smoke pencil and hold it near potential leak spots. If the smoke is drawn out of or blown into the room, you've found a draft.
- Focus on Major Junctions: Don't forget large, often-overlooked areas like the attic hatch and the basement rim joists (where the foundation meets the wood frame of the house). These are notorious for significant air leakage.
- Sealing Strategy: Once leaks are found, use caulk for gaps smaller than 1/4 inch and expanding foam spray for larger openings. Weatherstripping is ideal for movable components like doors and windows.
This process flow infographic outlines the professional approach to air leakage detection, moving from a whole-house measurement to pinpointing specific problem areas.
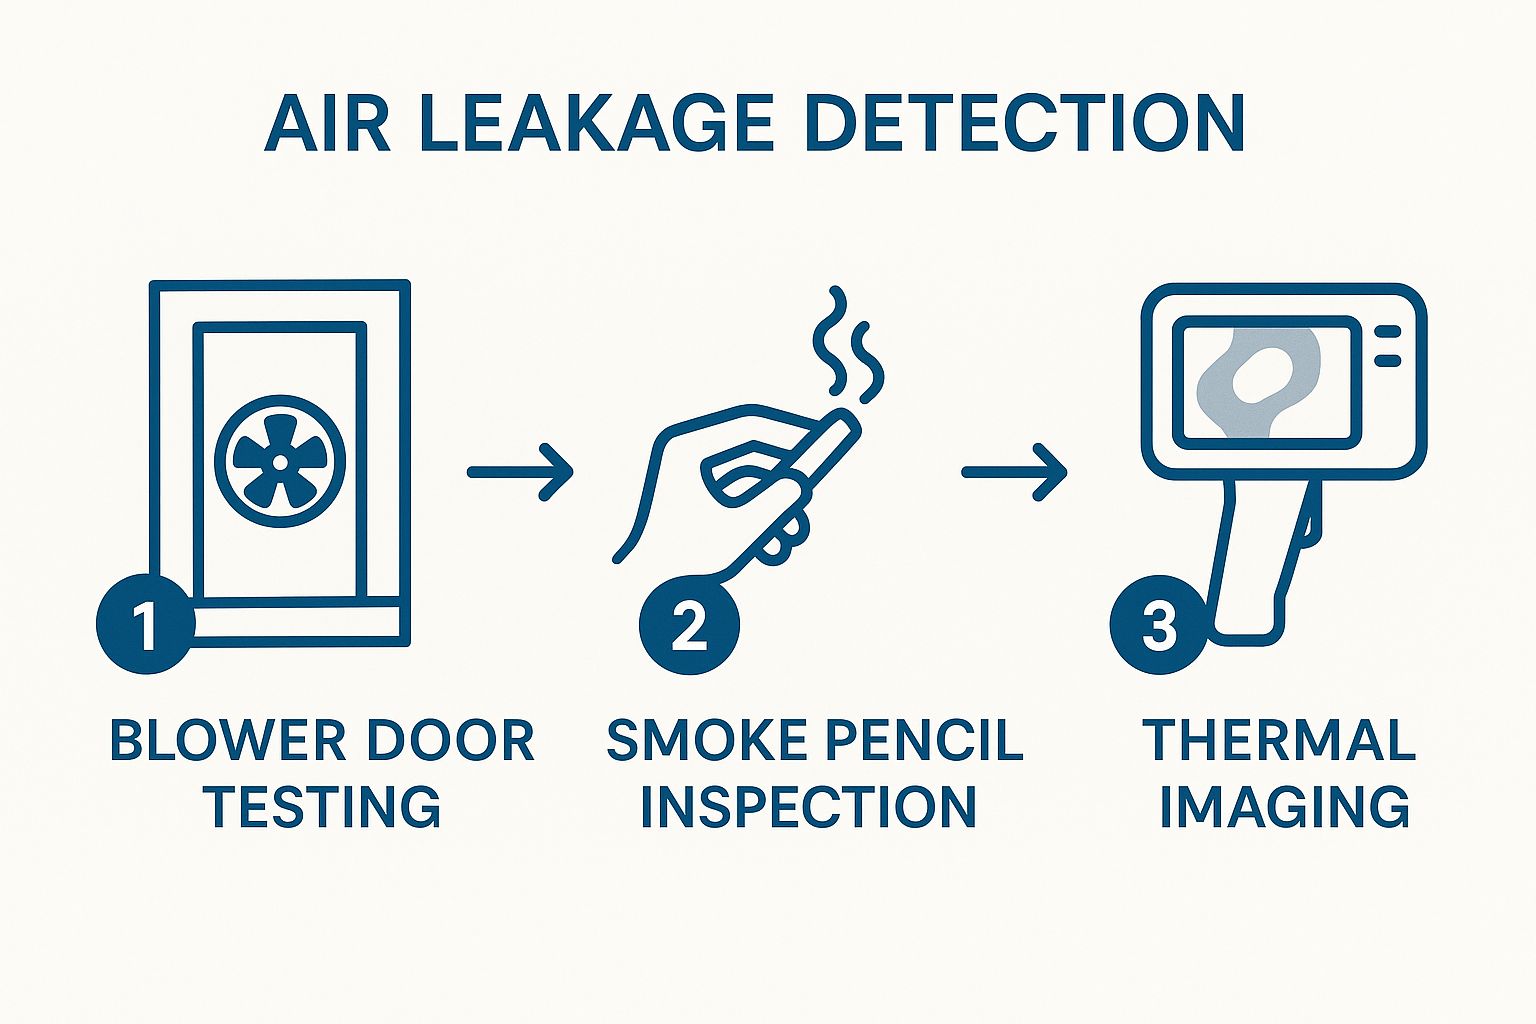
The sequence illustrates how a blower door test first quantifies the overall leakiness, followed by targeted smoke and thermal inspections to find the exact sources of infiltration.
Why This Assessment Is Crucial
The benefits of a tight building envelope are substantial. Homes built to ENERGY STAR standards are often 15-20% more airtight than those built to standard code, leading to direct energy savings. State-led initiatives, like Vermont's weatherization programs, have demonstrated that air sealing alone can result in average energy savings of 23%. By reducing drafts, you also improve indoor air quality; while it may seem counterintuitive, sealing your home allows your ventilation system and filters for air vents in your home to work as designed, controlling the air you breathe rather than letting in unfiltered outdoor air. This step in your home energy audit checklist provides a high return on investment for both your wallet and your comfort.
3. HVAC System Evaluation
Your Heating, Ventilation, and Air Conditioning (HVAC) system is likely the single largest energy consumer in your home. Evaluating its performance is a non-negotiable part of a thorough home energy audit checklist. An inefficient or poorly maintained system works harder than necessary, driving up utility bills and failing to provide consistent comfort. This assessment involves checking the equipment's age and efficiency rating, the integrity of your ductwork, and its overall maintenance status to ensure it's operating at peak performance.
Neglecting your HVAC system is like driving a car without ever changing the oil or checking the tire pressure. It might still run, but it will perform poorly, consume more fuel, and eventually break down. Identifying and addressing inefficiencies within your heating and cooling equipment can lead to some of the most significant energy savings a homeowner can achieve, improving air quality and extending the lifespan of the machinery.
Practical Steps for Your Assessment
While some HVAC diagnostics require a professional, you can perform several key checks yourself to gauge your system's health and efficiency.
- Check the Air Filter: A clogged, dirty filter is the most common cause of HVAC inefficiency. It restricts airflow, forcing the system to work harder. Check your filter monthly and replace it according to the manufacturer's recommendations (typically every 1-3 months).
- Inspect Ductwork: Visually inspect all accessible ductwork in your attic, crawlspace, or basement. Look for disconnected sections, gaps, or holes. Feel along the seams for air leaks while the system is running. Even small leaks can waste a significant amount of conditioned air.
- Listen for Unusual Noises: Turn on your system and listen for sounds like grinding, squealing, or rattling. These often indicate mechanical problems, such as a failing motor or a loose part, that need immediate attention from a technician.
- Measure Temperature Differential: Use a digital thermometer to measure the air temperature at a return vent (where air enters the system) and a supply vent (where it comes out). A healthy air conditioner should produce a temperature drop of about 15-20°F. A significantly smaller difference could indicate issues like low refrigerant.
Why This Assessment Is Crucial
The financial and comfort benefits of an efficient HVAC system are substantial. According to ENERGY STAR, upgrading from an old 10 SEER air conditioning unit to a modern 16 SEER model can save a homeowner in a hot climate over $300 annually. Studies in California have shown that properly sealing ductwork can achieve energy savings of 15-25%. For those in colder regions, installing a high-efficiency heat pump can reduce heating costs by as much as 30-50%. If your assessment reveals an aging or underperforming unit, it may be time to consider a replacement. You can get a clearer idea of your options and find information on when to replace your HVAC to make a cost-effective decision for your home.
4. Window and Door Performance Analysis
After assessing your home’s main thermal barrier, the next item on your home energy audit checklist is to analyze your windows and doors. These openings, often called fenestration systems, can be major sources of energy loss, accounting for 25% to 30% of residential heating and cooling energy use. A thorough analysis involves checking their thermal performance, looking for air leakage, and evaluating their overall condition. This step is essential because even a well-insulated house can bleed energy through old, inefficient, or poorly sealed windows and doors.
Think of windows and doors as the weak links in your home's armor. An old, single-pane window offers about as much insulation as a thin sweater on a freezing day. Identifying these weak points allows you to seal up costly drafts and reduce heat transfer, leading to significant savings, a more comfortable indoor environment, and less strain on your HVAC system.
Practical Steps for Your Assessment
Evaluating windows and doors is a hands-on process that combines visual checks with simple tests. You can quickly identify problem areas without specialized equipment.
- Check for Air Leaks: On a windy day, close your windows and doors and hold a lit incense stick or a thin piece of tissue paper near the frames. If the smoke or paper wavers, you have an air leak. Also, look for visible daylight around the edges of closed doors and window sashes.
- Inspect the Glazing: Look for condensation or fogging between the panes of double- or triple-pane windows. This is a clear sign that the seal has failed, allowing the insulating gas to escape and drastically reducing the window's efficiency.
- Examine Weatherstripping and Caulking: Check the condition of the weatherstripping around all operable windows and doors. Is it cracked, compressed, or missing? Inspect the exterior caulking for gaps or deterioration where the window or door frame meets the wall.
- Test for Operation: Open and close each window and door. Difficulty in operation can sometimes indicate that the frame has warped, which often creates new gaps for air to pass through.
Why This Assessment Is Crucial
The financial and comfort benefits of high-performance windows and doors are substantial. According to ENERGY STAR, replacing single-pane windows with ENERGY STAR qualified models can save a homeowner between $126 and $465 annually, depending on their climate zone. In colder climates, like Minnesota, homeowners have seen their heating costs drop by as much as 12% after upgrading to triple-pane windows. In sunny regions, retrofitting windows with Low-E (low-emissivity) coatings can reduce cooling costs by 10% to 15%. If your assessment reveals poor performance, addressing these issues through repair, sealing, or replacement is a smart investment in your home's efficiency.
5. Water Heating System Assessment
Often overlooked in a standard home energy audit checklist, your water heating system is one of the largest energy consumers in your home, typically accounting for 14-18% of your utility bill. This assessment involves a detailed examination of your entire domestic hot water system, from the heater itself to the pipes that deliver hot water to your taps. Evaluating its efficiency, age, and maintenance status is key to uncovering significant energy and cost-saving opportunities.
Think of it like this: leaving a high-performance car idling 24/7 would be an incredible waste of fuel. An old, inefficient, or oversized water heater does the same thing with energy, constantly working to keep a large tank of water hot whether you need it or not. By identifying inefficiencies in this system, you can stop this "energy idling" and make a substantial dent in your monthly bills.
Practical Steps for Your Assessment
A comprehensive assessment of your water heater doesn't require a plumber's toolkit. You can gather a lot of information through simple observation and basic checks.
- Check the Temperature Setting: Many water heaters are set to 140°F by default, which is unnecessarily high and can pose a scalding risk. The U.S. Department of Energy recommends a setting of 120°F, which is sufficient for most household needs and can reduce water heating costs by up to 10%.
- Inspect for Leaks and Corrosion: Carefully examine the tank, pipes, and fittings for any signs of water leaks, rust, or corrosion. Even a small, slow drip can waste a significant amount of hot water and energy over time, and corrosion is a sign that the unit may be nearing the end of its life.
- Insulate Pipes and the Tank: Touch the hot water pipes coming from your heater. If they are warm to the touch, they are losing heat. Insulating the first several feet of hot and cold water pipes with inexpensive foam pipe sleeves is a simple DIY fix. If you have an older storage tank model, consider an insulating blanket to reduce standby heat loss.
- Determine the Age and Efficiency: Look for the manufacturer's label on the side of the tank to find the serial number, which usually encodes the manufacturing date. Also, look for the Uniform Energy Factor (UEF) rating; the higher the number, the more efficient the unit. A heater that is over 10-12 years old is likely much less efficient than modern models.
Why This Assessment Is Crucial
The financial impact of an efficient water heater is substantial. Homeowners who switch from a standard electric tank heater to an ENERGY STAR certified heat pump water heater can save over $300 annually. Similarly, families in larger homes who install a tankless water heater, like those from Rinnai or Navien, can reduce their gas usage for water heating by 25-30% by only heating water on demand. In sunny climates like Florida, a solar water heating system can meet 50-80% of a household's hot water needs, drastically cutting utility bills. This part of your home energy audit is critical for identifying one of the biggest energy hogs in your home and creating a plan to tame it.
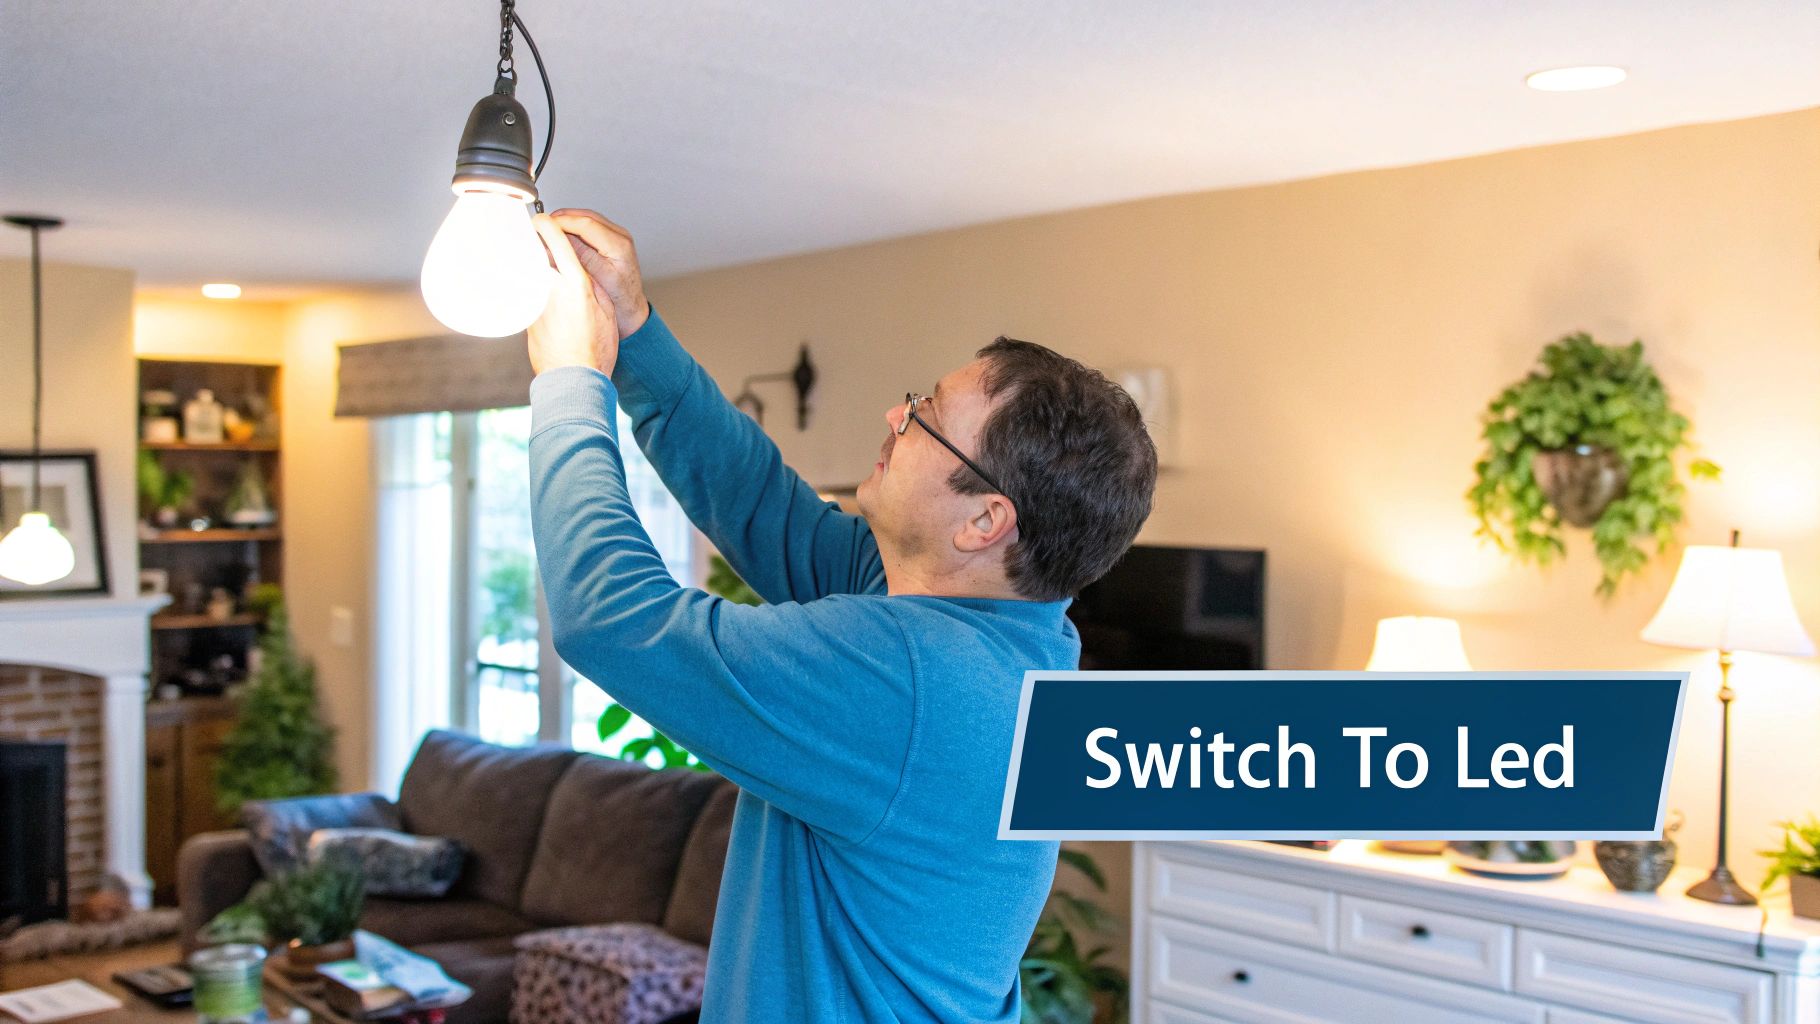
6. Lighting and Electrical Systems Review
An often-overlooked yet significant part of any comprehensive home energy audit checklist is a thorough review of your lighting and electrical systems. From the bulbs you use to the appliances you leave plugged in, these components collectively account for a substantial portion of your monthly energy bill. This evaluation identifies opportunities to reduce electrical consumption through efficient technology, smart controls, and optimized usage patterns, directly impacting your home's overall energy profile and lowering costs.
Think of your home's electrical system as a network of small, constant energy drains. Individually, a single incandescent bulb or a standby television might seem insignificant. However, when multiplied across every room and every device, the cumulative effect is a major drain on your power grid and your wallet. Identifying and upgrading these inefficiencies provides one of the quickest returns on investment in a home energy audit.
Practical Steps for Your Assessment
Evaluating your lighting and electrical usage is straightforward and requires minimal specialized equipment. Start by taking inventory and observing your daily habits.
- Audit Your Light Bulbs: Walk through your home and count the number of incandescent or CFL bulbs still in use, particularly in high-traffic areas like kitchens and living rooms. An incandescent bulb wastes about 90% of its energy as heat. Upgrading these fixtures is a primary goal.
- Identify "Phantom Loads": Many electronics, like TVs, game consoles, and chargers, draw power even when turned off. Use a "Kill-A-Watt" meter, a simple device that measures electricity usage from an outlet, to identify which devices are the biggest "vampire power" offenders.
- Assess Lighting Controls: Do you have dimmers, motion sensors, or smart plugs? Note rooms where lights are frequently left on, such as bathrooms, hallways, or closets. These are ideal locations for automated controls that ensure lights are only on when needed.
- Check for Electrical Hazards: During your walkthrough, feel outlets and switch plates. If they are warm to the touch, or if you notice any flickering lights, it could signal a dangerous wiring issue that requires a professional electrician.
Why This Assessment Is Crucial
The impact of an electrical systems review is immediate and measurable. For instance, a whole-house conversion to LED lighting can save the average family $75-$150 annually. Furthermore, homeowners using smart lighting systems have been shown to reduce lighting-related energy use by 40-60%. These savings compound when you consider that ENERGY STAR certified appliances use 10-50% less energy than their standard counterparts. By methodically identifying and eliminating electrical waste, you create a more efficient and safer home. This proactive approach complements other energy-saving efforts, such as optimizing your HVAC, where you can find valuable insights on recommended thermostat settings for summer to maximize your savings.
7. Renewable Energy Potential Assessment
A forward-thinking component of a modern home energy audit checklist is assessing your property's potential for renewable energy generation. This step moves beyond merely reducing consumption to actively producing clean energy on-site. The assessment evaluates the feasibility of systems like solar photovoltaic (PV) panels, solar hot water heaters, or geothermal heat pumps. It analyzes site-specific factors, including your property’s orientation, available space, local climate, and your family's energy usage patterns to see if a renewable installation makes financial and practical sense.
Think of this as shifting from being just a consumer of energy to a producer. While optimizing insulation and sealing air leaks reduces your energy bill, generating your own power can slash it to zero or even earn you credits from your utility company. This evaluation determines if your home is a good candidate to take that next step, transforming your property into a self-sustaining asset and significantly reducing your carbon footprint.
Practical Steps for Your Assessment
You can perform a preliminary assessment of your home's renewable energy potential with some accessible online tools and basic observations.
- Estimate Solar Potential: Use free online tools like NREL's PVWatts Calculator. By simply entering your address, you can get a surprisingly detailed estimate of the solar energy your roof could generate, along with potential cost savings based on local utility rates.
- Evaluate Your Roof: Before considering solar, inspect your roof. Is it in good condition? How old is it? A roof nearing the end of its lifespan should be replaced before installing solar panels, which are warrantied for 20-25 years. Also, note the roof's orientation (south-facing is ideal in the Northern Hemisphere) and check for significant shading from trees or nearby buildings.
- Research Local Incentives: The financial viability of renewable energy often hinges on government incentives. Look up federal tax credits (like the Residential Clean Energy Credit), state rebates, and local utility programs. These can dramatically reduce the upfront cost of an installation.
- Consider Geothermal Feasibility: If you have adequate yard space, a geothermal system might be an option. These systems use the stable temperature of the earth to provide highly efficient heating and cooling. This assessment requires a professional evaluation but can be a powerful long-term investment.
Why This Assessment Is Crucial
The economic and environmental benefits of on-site renewables are compelling. In California, many residential solar installations achieve a full payback in under 15 years, after which they provide virtually free electricity for the remainder of their lifespan. Homeowners in the Midwest have seen geothermal heat pumps reduce their annual heating and cooling costs by an impressive 40-60%. For those who cannot install panels directly, many regions offer community solar programs that allow you to benefit from renewable energy without a personal installation. This assessment is a crucial final step in a home energy audit, offering a path toward long-term energy independence and sustainability.
7-Point Home Energy Audit Checklist Comparison
| Assessment Type | Implementation Complexity 🔄 | Resource Requirements ⚡ | Expected Outcomes 📊 | Ideal Use Cases 💡 | Key Advantages ⭐ |
|---|---|---|---|---|---|
| Insulation Assessment | Moderate – involves visual, thermal imaging, some access challenges | Requires thermal imaging equipment and inspection tools | High energy savings (15-25%), improved comfort | Existing homes with aging or insufficient insulation | High ROI, detects hidden thermal gaps |
| Air Leakage Detection | Moderate to High – blower door, smoke testing, thermal imaging | Specialized equipment like blower doors and smoke pencils | Reduces energy loss by 10-30%, improves air quality | Homes with drafts, weatherization programs | Cost-effective fixes, enhances comfort and indoor air quality |
| HVAC System Evaluation | High – requires professional expertise and detailed system checks | Professional tools for airflow, pressure, and efficiency | Significant energy savings (20-40%), extended equipment life | Homes with aging or inefficient HVAC systems | Optimizes major energy consumer, improves comfort and longevity |
| Window and Door Performance Analysis | Moderate – requires measuring U-factors, air infiltration testing | Equipment for thermal and air leakage testing | Energy savings up to 25%, improved comfort, increased home value | Homes with older fenestration or planned upgrades | Enhances aesthetics and performance, reduces drafts |
| Water Heating System Assessment | Moderate – involves efficiency rating checks and system inspections | Tools for measuring temperature, flow, and insulation | Savings of 20-50% on water heating costs | Homes with outdated water heaters or seeking efficiency upgrades | High-efficiency options improve comfort and reduce costs |
| Lighting and Electrical Systems Review | Low to Moderate – lighting inventory and panel assessments | Basic meter tools, some technical knowledge | Immediate energy savings (up to 75% with LED upgrades) | Homes seeking quick electrical and lighting improvements | Rapid savings, improves safety, enables smart controls |
| Renewable Energy Potential Assessment | High – comprehensive site, structural, and economic evaluation | Access to solar/wind assessment tools and financial analysis | Long-term savings and energy independence | Homes suitable for solar, geothermal, or wind installations | Increases property value, lowers utility dependence |
From Checklist to Action: Your Next Steps Toward Energy Savings
You have officially completed your initial walkthrough, transforming from a passive homeowner into an active energy detective. Armed with the insights from your comprehensive home energy audit checklist, you now possess a detailed map of your home's energy performance, pinpointing exactly where your hard-earned money is escaping. This is far more than just a list of problems; it’s a personalized blueprint for creating a more comfortable, efficient, and cost-effective living environment.
Think of it this way: you wouldn't start a road trip without a map. Similarly, you shouldn't begin making energy upgrades without this foundational data. You’ve moved beyond guesswork and into the realm of informed decision-making. You now know that the draft from the master bedroom window isn't just an annoyance; it's a quantifiable energy leak. The old, humming refrigerator in the garage isn't just noisy; it's a significant drain on your electrical bill.
Prioritizing Your Energy-Saving Plan
The sheer volume of potential improvements can feel overwhelming, but the key is strategic prioritization. Not all fixes are created equal, and your next step is to categorize your findings to create a phased action plan. This approach allows you to secure immediate wins while planning for more substantial future investments.
Organize your list into three distinct categories:
- Low-Hanging Fruit (The Weekend Wins): These are the high-impact, low-cost fixes you can likely tackle yourself in a weekend. Sealing air leaks with caulk and weatherstripping, wrapping your water heater tank and pipes with insulation, and replacing incandescent bulbs with LEDs fall squarely into this category. These small actions often yield a surprisingly high return on investment and provide instant gratification.
- Medium-Term Investments (The Planned Projects): These tasks require more planning and a larger budget but offer significant long-term savings. This could include adding attic insulation to meet recommended R-values, upgrading single-pane windows to more efficient double-pane models, or replacing an outdated, energy-guzzling appliance you identified during your audit.
- Major Upgrades (The Professional-Grade Solutions): This tier involves complex systems that are best left to certified professionals. Your HVAC system is the prime example. While your audit may have revealed signs of inefficiency like short cycling or uneven cooling, a precise diagnosis requires specialized tools and expertise. Upgrading to a high-SEER air conditioner or heat pump is a major investment, but for residents of Palm Beach County, it's the single most impactful step toward reducing summer energy bills.
The Critical Role of Your HVAC System
While every item on your home energy audit checklist is important, the performance of your heating, ventilation, and air conditioning (HVAC) system deserves special attention. It is the heart of your home's energy consumption, often accounting for nearly half of your utility expenses, especially in Florida's demanding climate.
Your DIY audit was crucial for spotting the red flags: dirty filters, blocked vents, or unusual noises. However, internal issues like refrigerant leaks, failing capacitors, or ductwork breaches are invisible to the naked eye. These hidden problems can silently degrade efficiency, forcing your system to work harder, consume more energy, and ultimately fail prematurely. A professional HVAC evaluation is not just a recommendation; it is an essential component of a truly thorough energy audit. An expert can measure airflow, check refrigerant levels, and inspect electrical components to ensure your system is operating at peak performance.
By systematically working through your prioritized list, you are not just checking off tasks. You are taking deliberate, powerful steps to lower your carbon footprint, enhance your family's comfort, and unlock substantial, long-term financial savings. Your completed checklist is the starting line, not the finish line.
Has your home energy audit checklist revealed that your air conditioner is underperforming or struggling to keep up with the Florida heat? The certified technicians at Florida Cooling Group can perform a professional diagnostic to pinpoint inefficiencies and provide expert repair or replacement solutions. Contact Florida Cooling Group today to turn your audit insights into real, measurable energy savings.