(561) 400-2205
When your AC stops blowing cold air, don't panic. The culprit is often something surprisingly simple, like a wrong thermostat setting, a tripped circuit breaker, or even just a clogged air filter. I've seen it countless times—a quick check of these three things can often get your cool air back on in minutes, no service call required.
Quick Fixes for When Your AC Stops Cooling
We all know that sinking feeling when warm air starts trickling from the vents on a sweltering Florida day. Before you assume a catastrophic failure, it's smart to run through a few basic checks. More often than not, the solution is something you can easily handle yourself. This isn't about becoming an HVAC technician; it's about ruling out the simple stuff first.
These initial steps are the fastest way to figure out if you have a minor hiccup or a bigger problem on your hands. Let's start with the basics every homeowner should know.
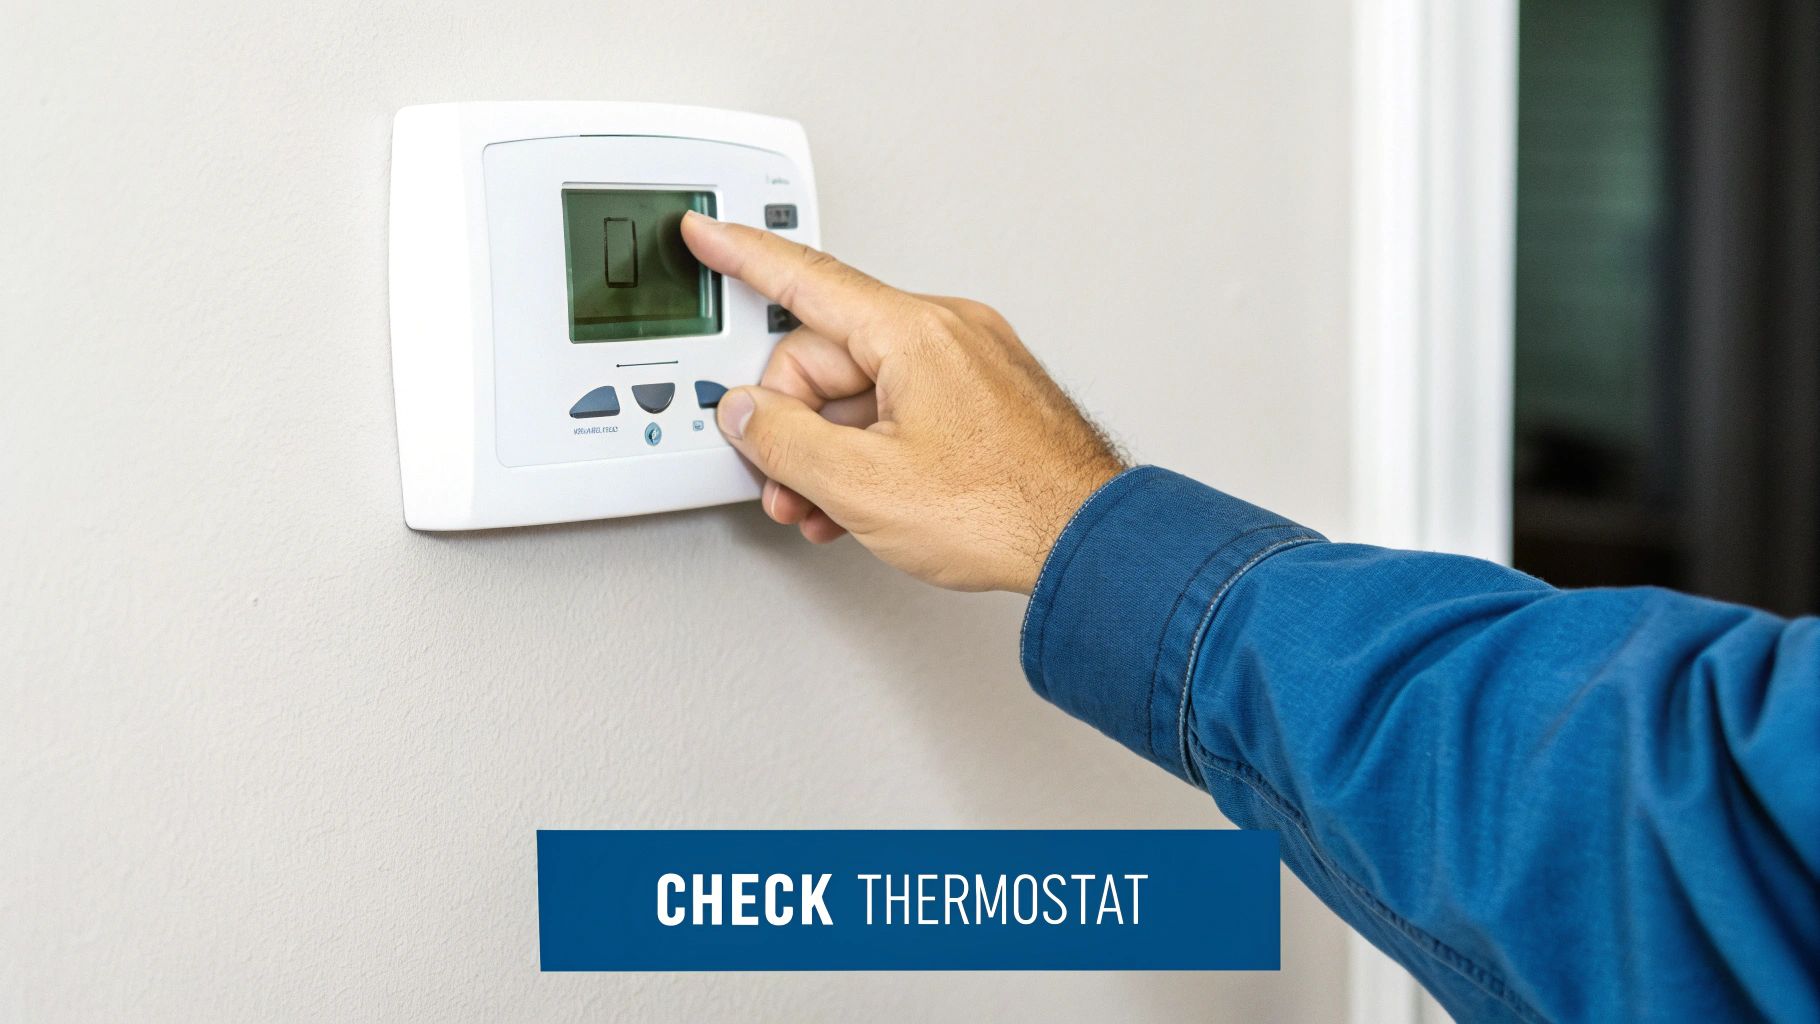
Check Your Thermostat Settings
It sounds almost too obvious, but you’d be surprised how often incorrect thermostat settings are the real issue. It's easy for someone to accidentally switch it to 'Heat' or 'Fan Only.' The 'Fan' setting is especially tricky because air is still coming out of your vents, it just isn't being cooled.
So, your very first move should be to walk over to the thermostat. Make sure it’s set to 'Cool' and that the target temperature is at least 3-5 degrees lower than the current room temperature. If it's not set lower, the system has no reason to kick on. Also, glance to see if it’s on a 'Hold' or 'Vacation' setting that might be overriding your schedule.
This handy guide walks you through the first three things to check.
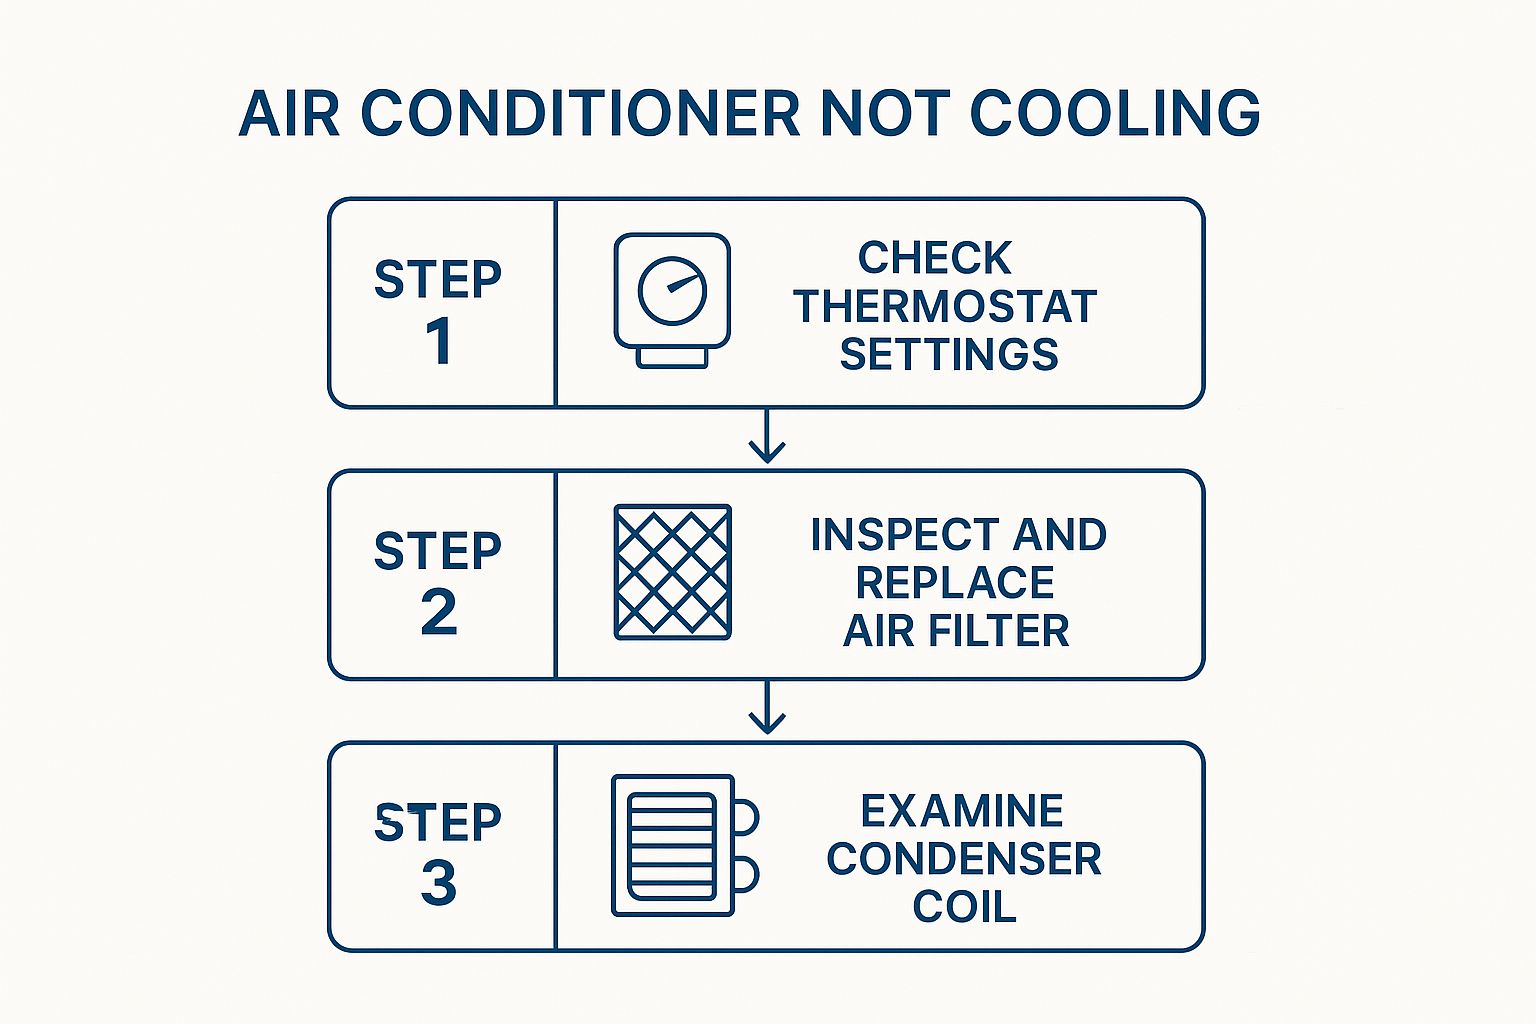
As the graphic shows, always start with the easiest potential fixes—your thermostat settings, filters, and coils—before worrying about a more serious breakdown.
Before diving deeper, this simple checklist summarizes the very first things to look at.
Initial DIY Diagnostic Checklist
| Checklist Item | What to Look For | Simple Solution |
|---|---|---|
| Thermostat Mode | Is it set to 'Cool'? | Switch from 'Heat' or 'Fan' to the 'Cool' setting. |
| Temperature Setting | Is the set temp lower than the room temp? | Lower the thermostat by 3-5 degrees to trigger the AC. |
| Circuit Breaker | Is the AC breaker in the 'On' position? | If tripped, flip it fully to 'Off' then back to 'On'. |
| Air Filter | Is it visibly clogged with dust or debris? | Replace the filter with a new, clean one. |
| Vents & Registers | Are they blocked by furniture or rugs? | Move any obstructions to ensure clear airflow. |
Running through these quick checks can often resolve the issue without needing to go any further.
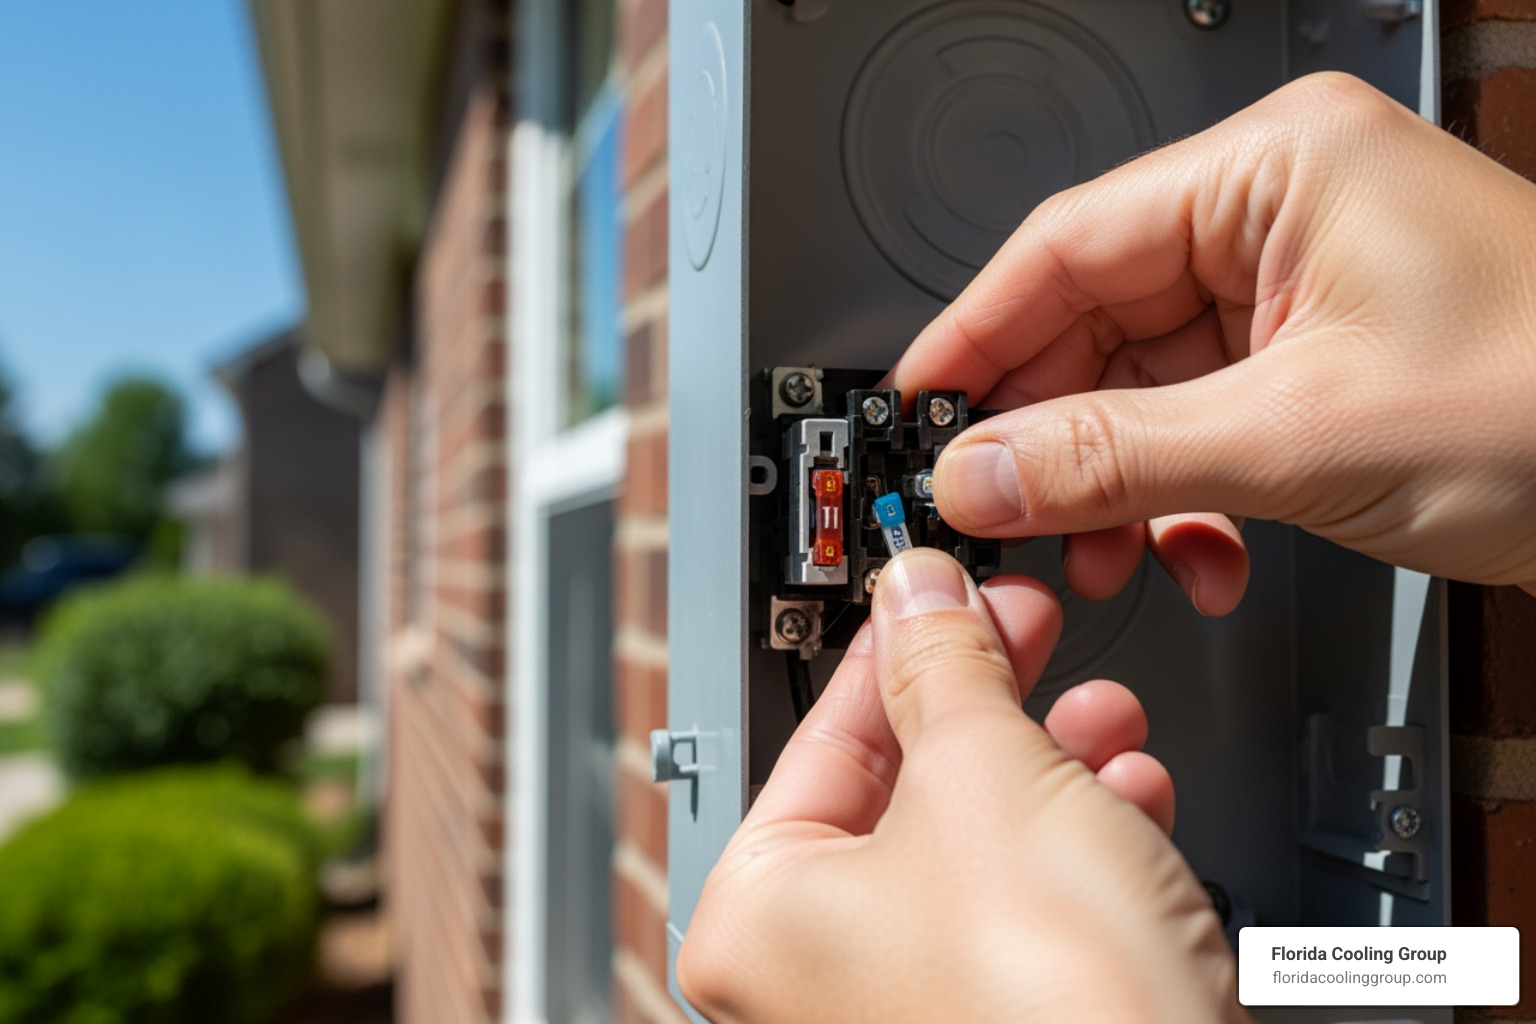
Inspect the Circuit Breaker
Your air conditioning system is actually two major parts: an indoor unit (the air handler) and an outdoor unit (the condenser). Each one usually has its own dedicated circuit breaker. If you've had a brief power surge, one of them might have tripped to protect the equipment.
Go to your home's main electrical panel and look for the breakers labeled "AC," "Air Handler," "HVAC," or "Condenser." If a switch is flipped to the middle or 'Off' position, you've found your problem.
Pro Tip: Before you reset a tripped breaker, always turn your thermostat completely off. This prevents a sudden power jolt from damaging the system. Firmly push the breaker all the way to 'Off' before flipping it back to 'On'.
If the breaker trips again right away, that's a red flag. Do not keep resetting it. A recurring trip means there’s a more serious electrical issue that needs professional attention. It’s time to call Florida Cooling Group to diagnose the problem safely.
Ensure Air Vents Are Clear
One last simple thing to do is a quick walkthrough of your home. Check to make sure all your air vents—both supply and return—are open and aren't blocked by furniture, rugs, or curtains. This happens all the time after rearranging a room.
- Supply Vents: These are the vents that blow chilled air into your rooms.
- Return Vents: These are the larger grilles that pull warm air out of the room and back into the AC system.
When a big return vent gets blocked, your system can't pull in enough air to cool. We call this "air starvation." It makes the unit work way harder than it should, drastically cuts its cooling power, and can even cause the indoor evaporator coils to freeze into a solid block of ice, stopping the cooling process entirely.
Solving Airflow Issues That Stifle Your AC
So, you've checked the thermostat and the breaker, and everything seems fine. What’s next? Nine times out of ten, the problem isn't a catastrophic failure—it's just a simple case of your AC system struggling to breathe.
Think of it this way: your air conditioner is basically a heat-moving machine. If air can't flow freely through it, it simply can't do its job. Let's walk through the two most common culprits I see on service calls every single week. These are things you can absolutely check and fix yourself.
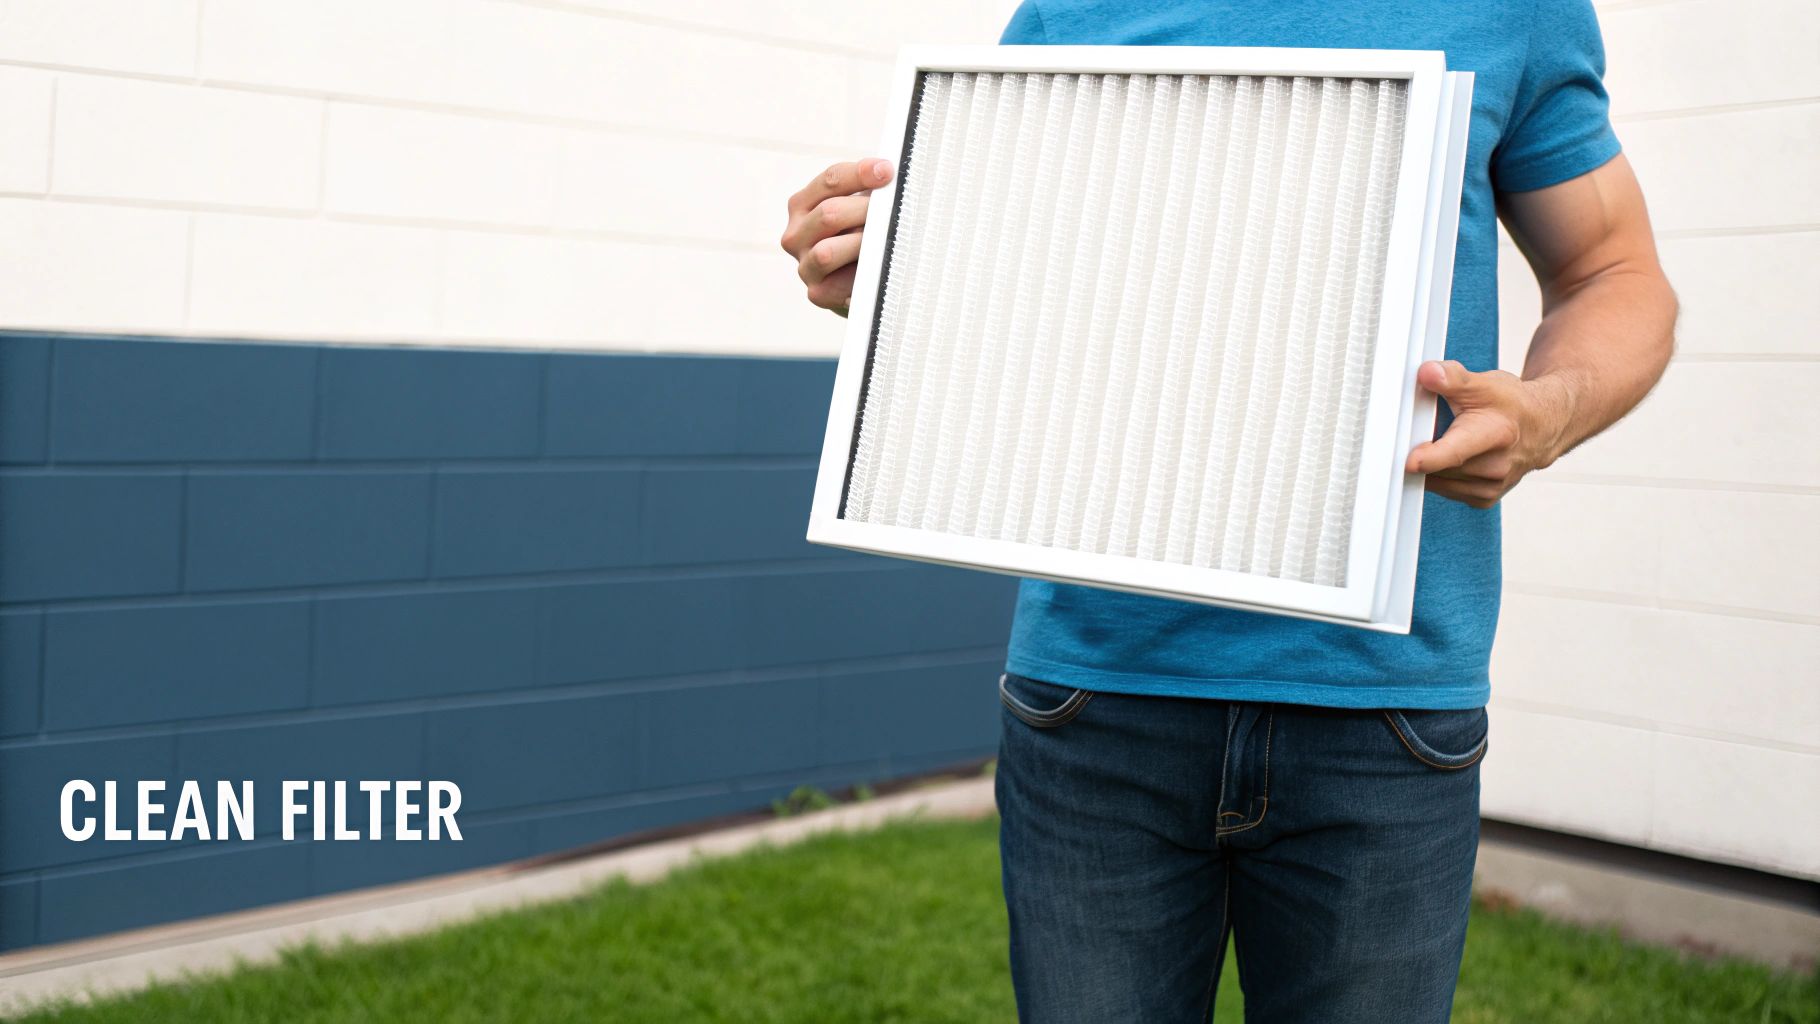
The First Line of Defense: A Clogged Air Filter
Your system's air filter is the unsung hero, quietly trapping dust, pet dander, and all sorts of gunk. But when it gets too full, that hero becomes the villain.
A clogged filter literally becomes a wall, choking off the air supply to your system. The fan motor has to work incredibly hard just to pull a trickle of air through, which means you get weak, lukewarm air blowing from your vents. It’s also incredibly stressful for the equipment, leading to expensive repairs down the road.
This isn't a minor issue. A struggling AC unit can use 15% to 30% more electricity. Just swapping out a dirty, clogged filter can boost your system's efficiency by up to 15% overnight. That's real money back in your pocket.
How to Check and Change Your Filter
This is probably the single most important piece of DIY maintenance you can do. It takes five minutes, tops.
- Find the filter. It's usually in a slot right on your indoor unit (the air handler) or behind a big vent grille on a wall or ceiling.
- Shut the system off at the thermostat first.
- Slide the old one out. Hold it up to a light. Can't see through it? It's toast. Time for a new one.
- Get the right size. The dimensions are always printed on the side of the filter (like 20x25x1). Snap a quick picture with your phone so you don't forget.
- Put the new one in. Look for the arrows on the new filter's frame—they need to point toward the furnace or air handler, in the direction the air is flowing.
If you're curious about the different types and what they do, we've got a great breakdown on filters for air vents in your home.
Your Overgrown Outdoor Condenser Unit
The other major airflow bottleneck is outside. Your outdoor unit, the condenser, is designed to dump all the heat it pulled from your house into the outside air. To do this, it uses a big fan to pull air through the metal fins that wrap around the unit.
But what happens when those fins get covered in grass clippings, leaves, dirt, and cottonwood fluff? The heat gets trapped. Your AC is essentially running in circles, unable to get rid of the heat it's collected. It will run and run, but your house won't get any cooler.
I once got a call from a homeowner whose AC ran for 12 straight hours without dropping the temperature a single degree. I got there and found the condenser unit was completely matted with dryer lint because their vent was pointed right at it. A five-minute cleaning with a hose and it was blowing ice-cold again.
Safely Cleaning Your Outdoor Unit
Giving your outdoor unit a quick rinse can work wonders. First thing's first: safety.
Go to your circuit breaker and flip the breaker for the AC. Then, find the outdoor disconnect box (a small metal box on the wall near the unit) and pull the handle or switch it to "off."
- Clear the Area: Trim back any bushes, weeds, or tree branches that are crowding the unit. You want at least two feet of clear space all the way around for it to breathe properly.
- Rinse It Gently: Take a regular garden hose with a spray nozzle and gently wash the fins. Start from the top and work your way down. Do not use a pressure washer! It will bend the delicate metal fins flat and cause a much bigger problem.
- Straighten Bent Fins: If you see some bent spots, you can gently use a butter knife or a special "fin comb" from a hardware store to carefully straighten them out.
Taking care of these two simple things—the filter inside and the condenser outside—will solve a surprising number of cooling problems and keep you from having to make a service call.
Diagnosing a Refrigerant Leak (And When to Call a Pro)
So, you’ve cleaned the filters and hosed down the outside unit, but your AC is still just pushing around warm air. When the basics don't work, it's time to consider a deeper issue. The problem could very well be the refrigerant—the lifeblood of your cooling system.
Think of it like the coolant in your car. It runs in a closed loop and shouldn't ever disappear. A common myth is that refrigerant gets "used up" like gasoline, but that’s just not how it works. If you're low, you have a leak somewhere.
A leak is a big deal. Not only does it kill your cooling, but it also forces your AC to work overtime, sending your energy bills through the roof and putting a ton of strain on expensive parts like the compressor.
Telltale Signs of Low Refrigerant
You can't check refrigerant levels yourself, but your AC will give you some pretty clear clues when something’s wrong. Learning to spot these is key to getting the right help quickly.
In our experience, refrigerant problems are behind a huge chunk of cooling failures. Industry data shows that leaks account for nearly 35-40% of service calls for ACs that won't cool. A leak can tank your AC’s performance by 20-30% or more. If you're curious, you can find more on the air conditioner market over at mordorintelligence.com.
Keep an eye (and ear) out for these classic signs:
- Warm Air From Vents: This one's the most obvious. The fan is blowing, but the air coming out is room temperature or even a little warm.
- Hissing or Bubbling Noises: A faint hissing sound coming from your indoor or outdoor unit is a dead giveaway for escaping refrigerant gas. You might also hear a weird gurgling noise from the refrigerant lines.
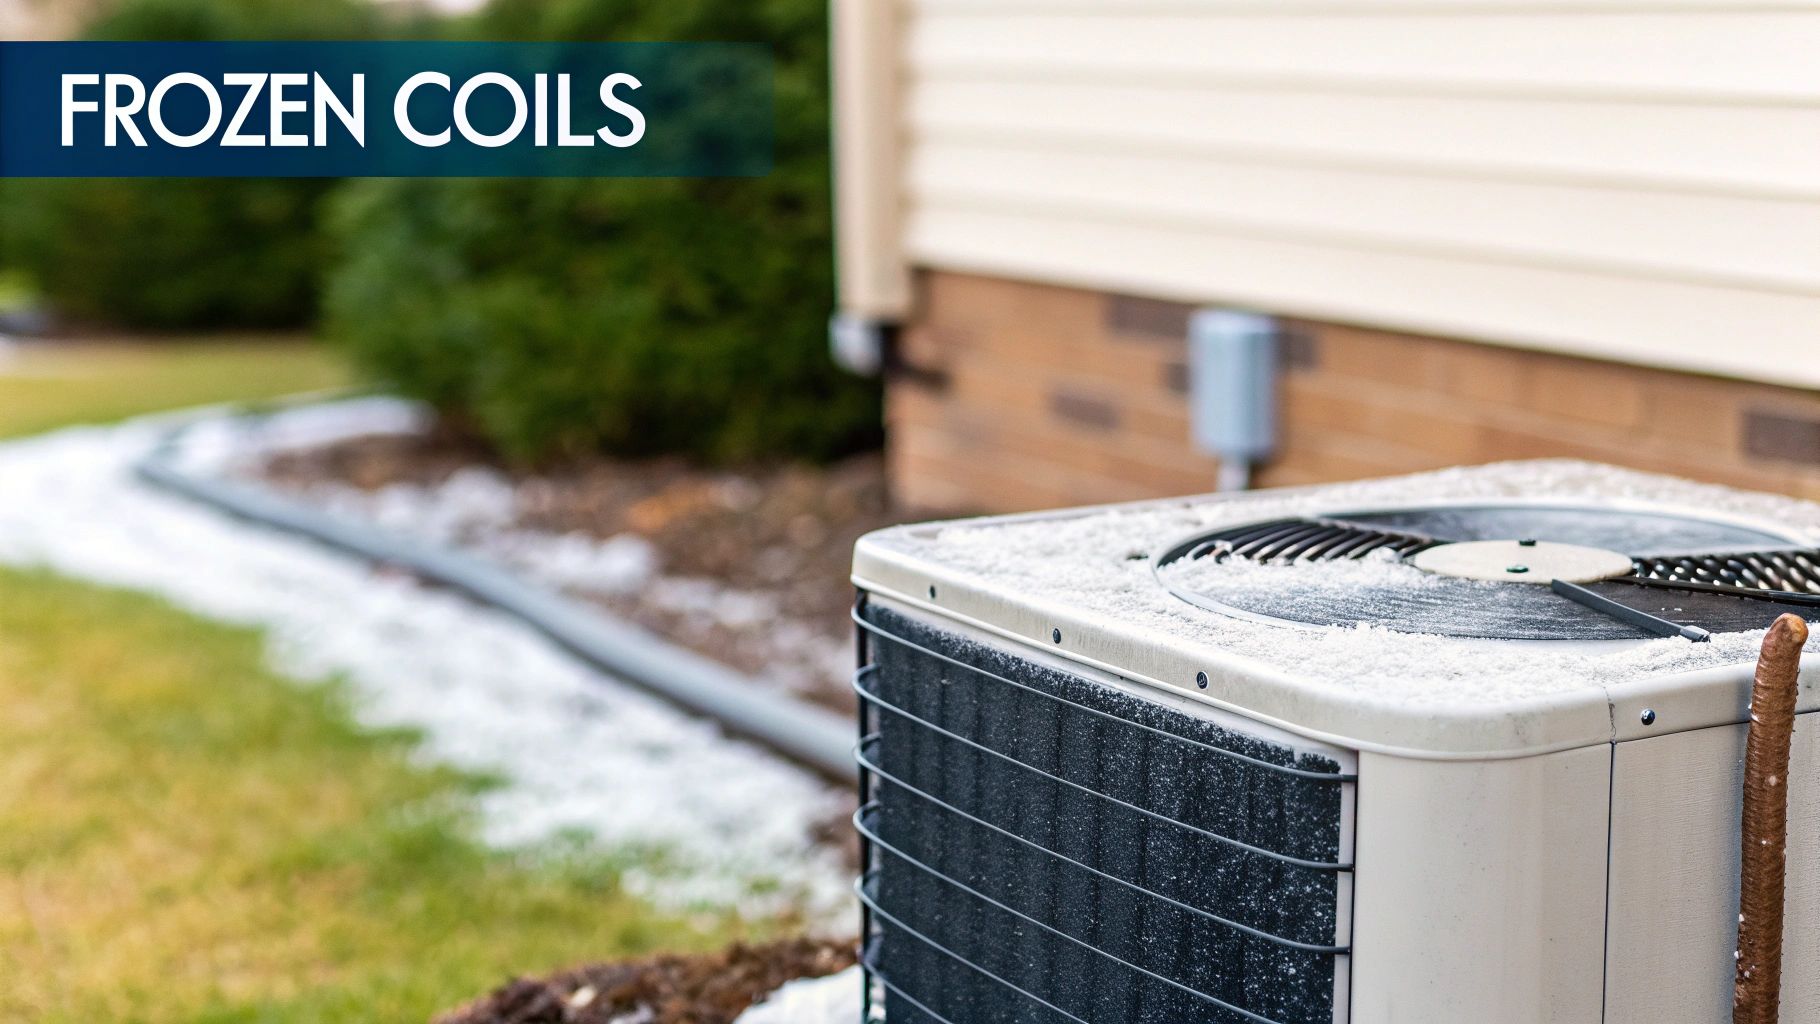
- Ice on Your AC Unit: This sounds backward, but it’s a classic symptom. Low refrigerant causes a pressure drop in the evaporator coils, making them get intensely cold. This super-chills the surrounding moisture, which then freezes onto the coils and copper lines, sometimes forming a solid block of ice.
- AC Runs Constantly but Doesn't Cool: Your thermostat is screaming for cold air, but the house just won't cool down. The system will run for hours on end without ever reaching the temperature you set.
Important Takeaway: Just adding more refrigerant without fixing the leak is a total waste of money. It’s like putting air in a tire with a nail in it. A real pro will always find and repair the leak first before recharging the system.
Why This Is Not a DIY Job
Dealing with refrigerant isn't just tricky—it’s also regulated by the EPA for a reason. These chemicals are potent greenhouse gases and can be hazardous. Only certified, licensed technicians are legally allowed to buy and handle them.
Trying to mess with refrigerant lines without proper training can lead to serious injury and can wreck your AC system. We cover some of the finer points of this in our guide on top AC refrigeration tips for year-round comfort.
If you notice any of these signs, your next step is simple: turn the system off to prevent more damage and call a professional you trust. When you call, be specific. Telling the technician, "I see ice on the copper pipe outside," gives them a huge head start in diagnosing and fixing the problem fast. Contacting Florida Cooling Group gets a certified expert to your door who can handle the leak safely and get your cool air back on.
Diving into Deeper Electrical and Mechanical Problems
So, you've checked the easy stuff. Your filters are clean, the airflow seems fine, and there are no obvious signs of a refrigerant leak, but your home is still hot. This is where we start getting into the more serious culprits: electrical and mechanical failures within the AC unit itself.
These are absolutely not DIY jobs. But knowing how to spot the symptoms is still a huge advantage. When you can tell a technician exactly what you're seeing and hearing, you give them a massive head start. It helps us narrow down the possibilities before we even open our toolbox, which can save you time and money on the service call.
Learning to Speak "Broken AC"
Your air conditioner has its own way of telling you what's wrong, mostly through the sounds it makes. One of the biggest mistakes I see homeowners make is ignoring a new or strange noise, hoping it will just go away. It won't. That sound is a warning sign, and listening to it can be the difference between a simple fix and a total system replacement.
Pay close attention, especially when the unit kicks on or shuts off. Different sounds point to very different problems.
-
A Loud Hum or Buzz: This is a classic. The thermostat calls for cool air, you hear it click, and then a loud, angry hum starts up outside, but the fan blade never moves. This almost always points to a failed capacitor. Think of the capacitor as a small battery that gives the motors a powerful jolt to get started. When it dies, the motors have no "kick" and just sit there humming, trying to spin.
-
Grinding or Scraping: Any kind of metallic grinding or screeching noise is bad news and needs immediate attention. This is the tell-tale sign of worn-out bearings inside the condenser fan motor. If you let it go, the motor will eventually seize up, causing your compressor to overheat. That turns a manageable repair into a catastrophic and expensive one.
-
Squealing or Shrieking: If you hear a high-pitched squeal coming from your indoor unit (the air handler), the problem is likely with the blower motor. Just like the outdoor fan, this usually means the bearings are shot. Since the blower is what actually pushes the cool air into your home, you'll feel little to no air coming from your vents.
-
Constant Clicking or Loud Clanking: Some clicking during normal operation is fine. But if you hear rapid, persistent clicking from the outdoor unit, it could be a failing relay or an electrical contactor. A much more alarming sound is a loud clank or bang, which can signal a major internal failure in the compressor—the heart of your system.
Being able to describe these sounds is incredibly helpful. Telling a professional, "I hear a loud buzz outside, but the fan isn't spinning," immediately gets them thinking about the capacitor.
The Compressor: Your System’s Engine
The compressor is, without a doubt, the most critical and costly part of your entire air conditioning system. It's the powerful engine that pumps refrigerant through the coils. If it dies, your AC is done for.
Compressor failure rarely happens out of the blue. It’s usually the end result of another problem that was left unaddressed. Things like running the system low on refrigerant, having poor airflow from a clogged filter, or a broken fan motor all put a tremendous amount of strain on the compressor, forcing it to work too hard until it finally burns out.
Safety First. Always.
We're talking about high-voltage components here. Capacitors, motors, and compressors carry enough electricity to cause serious injury or even death. Never, ever attempt to open up your AC unit's access panels or handle these parts yourself. This is a job that is strictly for trained, licensed, and insured professionals.
If you hear any of these scary noises or suspect a major part has failed, your next move is simple. Go to your circuit breaker, shut the power off to your AC system, and call Florida Cooling Group. Our technicians have the proper diagnostic tools and safety training to accurately test these parts and get your system back online safely and correctly.
Smart Maintenance to Prevent Future Breakdowns
When it comes to your air conditioner, the old saying about an ounce of prevention is worth a pound of cure couldn't be more true—especially here in the relentless Florida heat. The absolute best way to deal with an AC that’s not cooling is to stop it from happening in the first place.
This isn’t about becoming an HVAC technician overnight. It’s about building a simple, repeatable routine that keeps your system healthy. Think of it as a small investment of time that pays massive dividends in comfort, lower bills, and a much longer life for your AC.
Your Year-Round Maintenance Playbook
Consistency is everything. By breaking down the essential tasks into a simple schedule, you can stay ahead of problems without feeling overwhelmed. A well-maintained system doesn't just feel better; it runs cheaper. The Department of Energy estimates that routine maintenance can slash an AC's energy use by 5% to 15%. That's real money back in your pocket every month.
Quick Checks You Can Do Every Month
These are the simple check-ins that take just a few minutes but make a world of difference for your system's performance and the air you breathe.
First, check your air filter. This is non-negotiable in our dusty, humid climate. Once a month, just pull it out and hold it up to a light. If you can't see the light through it, it's time for a new one. A clogged filter is the number one cause of restricted airflow, which makes your system work way harder than it needs to.
Next, glance at your condensate drain line. Your AC pulls a ton of moisture out of the air, and it has to go somewhere. That "somewhere" is a PVC pipe, usually located outside near your condenser. When the system is running, you should see a slow drip of water coming out. If you ever spot a puddle of water near your indoor unit, that line is almost certainly clogged up.
Key Seasonal Upkeep
As the weather shifts, so do your AC's needs. These are the bigger tasks to tackle twice a year to get your system ready for the battles ahead.
The Spring Tune-Up (Before It Gets Hot)
- Give the Outdoor Unit Some Space: Your condenser needs to breathe. Make sure it has at least two feet of clearance on all sides. Trim back any bushes, weeds, or palm fronds that have crept too close over the winter.
- Gently Rinse the Coils: Head to your circuit breaker and turn off the power to the AC. Then, find the outdoor disconnect switch (usually in a metal box on the wall near the unit) and pull the handle to cut power there, too. With a garden hose on a gentle setting, spray down the fins from the outside to wash away all the dirt, pollen, and leaves that have built up.
The Fall Check-In (When Things Cool Off)
- Rinse and Repeat: Give the outdoor unit another good cleaning to wash away all the grime from a long, hard summer.
- To Cover or Not to Cover: This one is up for debate. If your unit sits under trees that dump leaves all fall, a breathable, purpose-built condenser cover can be a good idea. Just promise me you'll never wrap it in a plastic tarp—that's a recipe for trapping moisture, which leads to rust and mold.
"I've seen countless expensive compressor failures that could have been completely avoided with simple, regular cleanings of the outdoor unit. When that heat can't escape, it puts immense strain on the most vital part of the system."
What a Real Professional Tune-Up Looks Like
While your own maintenance is crucial, it’s not a substitute for an annual deep-dive from a certified pro. A technician from Florida Cooling Group goes much further, performing a full health check that spots hidden issues before they can turn into a sweaty, expensive emergency. It's the single best way to understand how regular maintenance extends your AC's lifespan.
A real tune-up is more than just a quick look. Here’s what should be on the technician's checklist:
- Electrical Inspection: Checking and tightening every electrical connection to prevent hazards and component failure.
- Component Checks: Measuring the voltage and amperage on the motors to make sure they're running within safe specs.
- Drain Line Flush: Power-flushing the condensate drain line to obliterate any algae or sludge buildup that could cause a backup.
- Thermostat Calibration: Making sure your thermostat is reading the room temperature accurately and telling the system what to do.
- Deep Coil Cleaning: Cleaning not just the outdoor coils but the indoor evaporator coils, which is critical for proper heat transfer.
- Refrigerant Level Check: Using gauges to verify the refrigerant charge is perfect. Too little or too much will destroy efficiency and damage the compressor.
- Full System Test: Running the AC through a complete cycle to confirm that it starts, runs, and shuts off exactly as it should.
By committing to this mix of simple DIY habits and one professional visit a year, you take back control. You stop reacting to problems and start preventing the conditions that cause your air conditioner not to cool in the first place.
Common Questions About AC Cooling Problems
When your home starts feeling more like a swamp than a sanctuary, a lot of questions start running through your mind. Why now? What's broken? We get these calls all the time from homeowners across Florida, so let's walk through the most common concerns when an air conditioner stops cooling.
Why Is My AC Running but Not Cooling the House?
This is, without a doubt, the number one complaint we hear. You can hear the system kick on, you feel air coming from the vents, but it’s not cold. It’s a frustrating situation that usually boils down to a breakdown in the heat transfer process.
Most often, the culprit is something blocking airflow. A filthy, clogged air filter is a classic example. Another is an outdoor condenser unit that's covered in dirt, grass clippings, or leaves. In both cases, your AC can't get rid of the heat it's pulled from your home. If those seem fine, you might be looking at a refrigerant leak, which is like trying to cool your house with an empty water bottle. In a worst-case scenario, it could be a bad compressor, the heart of the whole system.
How Can I Tell if My AC Is Low on Refrigerant?
While you can't hook up gauges and check the levels yourself, your AC will give off some pretty clear distress signals. Learning to spot them can save you from a much bigger headache later on.
The first thing you’ll probably notice is that your home just doesn't feel as cool as it used to, and your power bill is mysteriously creeping up. Get closer to the unit and listen for a subtle hissing or bubbling noise—that’s a tell-tale sign of escaping refrigerant. The most dramatic clue? Frost or a solid block of ice forming on the copper lines leading to your outdoor unit. That ice means the pressure is off, which is a direct symptom of low refrigerant.
A quick heads-up: refrigerant doesn't just get "used up" like gas in a car. It runs in a sealed system. If you're low, it means there's a leak. A pro needs to find and fix that leak before adding more refrigerant, otherwise, you're just throwing money away.
Should I Repair or Replace My Old AC Unit?
Ah, the big one. Every homeowner in Florida eventually has to make this call. It's a tough decision that hinges on balancing the immediate repair bill against the long-term savings and reliability of a new system.
A handy little trick we use is the "5,000 rule." Just multiply the age of your unit by the cost of the repair. If the total is more than $5,000, it's usually smarter to put that money toward a replacement.
Here are a few other things to weigh in your decision:
- Age: An AC unit in Florida works incredibly hard. Most give you a solid 10-15 years of service. If you're in that window, sinking a lot of cash into a major repair might not be the best investment.
- Efficiency: Older systems have much lower SEER ratings (think of it like MPG for your AC). Upgrading to a modern, high-efficiency unit can make a huge dent in your monthly FPL bill.
- Refrigerant Type: If your unit still uses R-22 refrigerant (often called Freon), it's on life support. The government has phased it out, making it incredibly expensive and difficult to get. Any repair involving R-22 is going to be costly.
- Breakdown Frequency: Is your AC technician on your speed dial? If you're constantly calling for one repair after another, it’s time to stop the bleeding and invest in a new, dependable system.
Trying to figure out these AC problems can feel overwhelming. If you’ve hit a wall and can’t solve the issue yourself, the certified experts at Florida Cooling Group are here to help 24/7. Get in touch with us for a professional diagnosis and a solution that gets your home cool again. You can learn more at https://floridacoolinggroup.com.
Charlie Hadida is a senior HVAC technician and the SEO lead at Florida Cooling Group, with years of real-world experience diagnosing, repairing, and installing residential and commercial HVAC systems throughout Palm Beach and Broward County.
Unlike generic marketing content, Charlie’s work is grounded in on-site service experience — from troubleshooting electrical and airflow issues to overseeing full system replacements, crane lifts, and code-compliant installations. His technical background allows him to translate complex HVAC concepts into clear, accurate, and helpful information for homeowners, property managers, and business owners.
In addition to working in the field, Charlie leads Florida Cooling Group’s SEO and content strategy, ensuring that all service pages, guides, and educational resources reflect real conditions technicians encounter every day. This includes topics such as AC repair, preventive maintenance, system replacements, energy efficiency, permitting requirements, and South Florida–specific climate challenges.
Charlie plays an active role in shaping Florida Cooling Group’s service standards, maintenance programs, and long-term customer education efforts. His combined technical and SEO expertise helps bridge the gap between what customers search for online and what actually matters when servicing HVAC systems in Florida’s demanding environment.
Licensed HVAC Technician (Florida)
Residential & commercial HVAC experience
Hands-on system diagnostics, repairs, and installations
Experience with rooftop units, split systems, and package units
Local experience serving Palm Beach & Broward County
Areas of Expertise:
AC Repair & Troubleshooting
Preventive Maintenance & Service Agreements
HVAC System Replacements & Change-Outs
Commercial HVAC Systems
South Florida HVAC Codes & Permitting